Pairing hearing aids to an iPhone is usually straightforward, but the process works best when you understand which hearing aids support Apple’s accessibility system, how Bluetooth pairing behaves, and what settings control calls, media, and microphone routing. In practice, I have found that most pairing problems come from three causes: the hearing aids are not in pairing mode, the iPhone is looking in the wrong menu, or an older accessory needs a manufacturer app instead of Apple’s native hearing device screen. This guide explains the full process for pairing hearing aids to iPhone, the models and standards involved, the settings that matter after connection, and the common fixes that restore a stable link.
On iPhone, hearing aids generally connect in one of two ways. The first is through Made for iPhone hearing aids, often shortened to MFi, which use Apple’s built-in Hearing Devices feature under Accessibility. The second is through Bluetooth Low Energy audio standards such as LE Audio and Auracast-capable ecosystems, often managed through the hearing aid brand’s app. Some products also use intermediary accessories, such as streamer neck loops or clip-on microphones, to bridge older Bluetooth protocols. Knowing which category your devices fall into matters because the steps are different, the available controls are different, and the troubleshooting path changes quickly if you start in the wrong place.
This topic matters because proper pairing affects more than convenience. When hearing aids are connected correctly, iPhone users can stream phone calls, FaceTime audio, podcasts, music, turn-by-turn directions, and accessibility audio directly into both ears with better clarity and lower listening effort. They can also adjust left and right levels, microphone balance, background sound handling, and live listening from the phone itself. For anyone with hearing loss, that can reduce communication fatigue, improve speech understanding in noise, and make everyday tasks such as taking calls in a grocery store or hearing navigation prompts while driving meaningfully easier.
Compatibility is the first checkpoint. Apple supports hearing devices through iOS accessibility features, but not every iPhone and not every hearing aid model supports the same functions. In clinic workflows and user support calls, I always verify four things before attempting pairing: the exact iPhone model, the iOS version, the hearing aid brand and model name, and whether the aids have current firmware. Apple’s support documentation, along with manufacturer compatibility lists from brands such as Oticon, Phonak, ReSound, Signia, Starkey, Widex, and Unitron, is the most reliable source. If the hearing aids are rechargeable, they also need enough battery charge before pairing begins, because low power commonly interrupts discovery and causes one side to connect while the other fails.
Check compatibility and prepare both devices
Before you pair hearing aids to iPhone, confirm whether your devices are MFi hearing aids, standard Bluetooth hearing aids using a companion app, or cochlear implant processors that follow their own support path. On the iPhone, go to Settings, then General, then About, and note the software version. On the hearing aid side, identify the full model name from the app, charger label, purchase paperwork, or the audiologist’s fitting software summary. Manufacturers often release several visually similar products with different wireless chips, so “Oticon Real” or “ReSound Nexia” is useful, while “my hearing aids” is not enough to confirm support.
Preparation should be systematic. Turn Bluetooth on in Settings. Charge the hearing aids fully, or insert fresh batteries if they use disposable cells. Close unnecessary audio apps, especially ones that may seize the Bluetooth audio route. If the hearing aids have previously been paired to another iPhone or iPad, or to a spouse’s device for testing, disconnect or forget them first. Hearing aids often prefer one active host relationship at a time, and I regularly see failed pairing attempts caused by an old tablet in the next room silently reclaiming the connection. If you use the brand’s app, install the latest version from the App Store before starting.
The fastest way to determine the correct path is to consult the brand’s connection method. MFi devices usually pair through Settings, Accessibility, Hearing Devices. Conventional Bluetooth accessories generally appear under Settings, Bluetooth, but many current hearing aids still require the manufacturer app to complete registration, permissions, remote control setup, and firmware checks. If your audiologist supplied a TV streamer, remote microphone, or phone clip, that accessory may be part of the system and can change how calls and media are routed. Reading the quick-start sheet from the brand is not optional; it prevents the most common setup mistakes.
How to pair Made for iPhone hearing aids
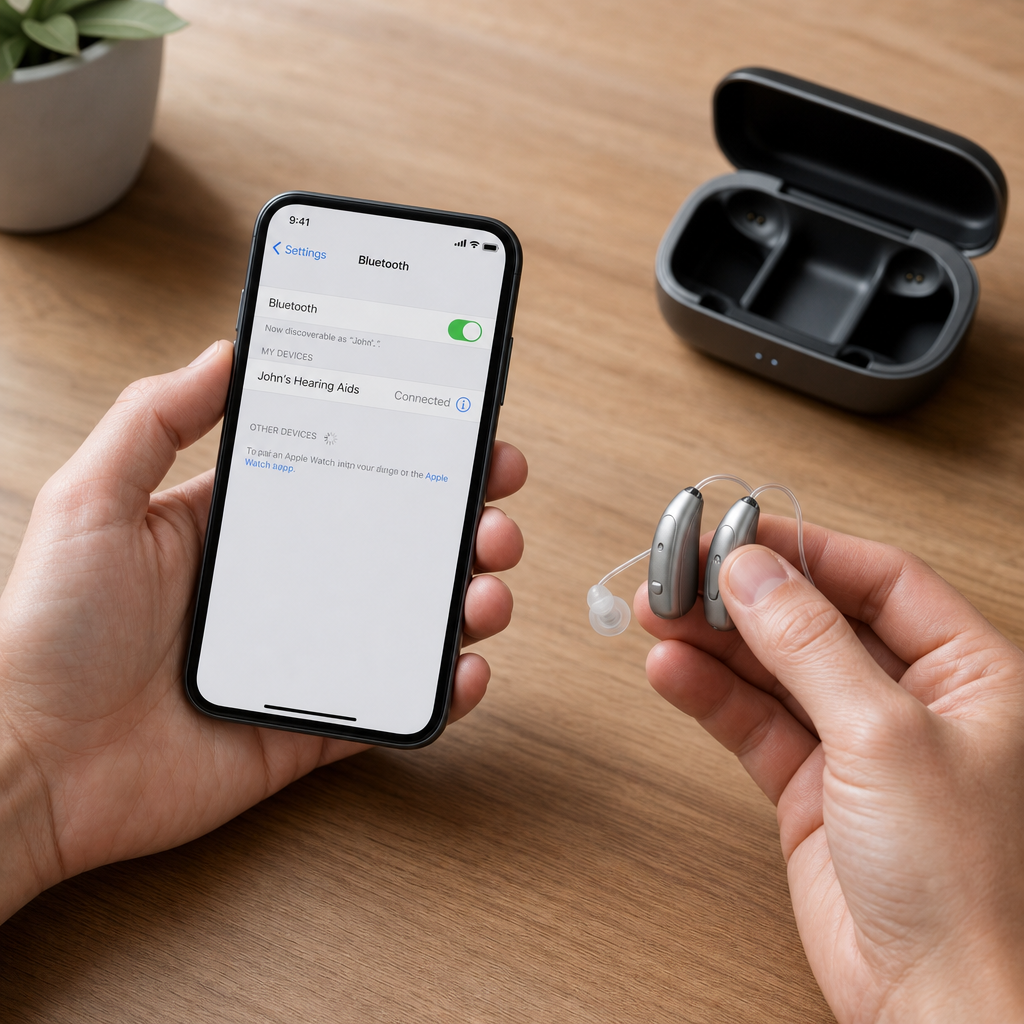
If your hearing aids support Apple’s native hearing device integration, the pairing process is consistent across brands. On the iPhone, open Settings, tap Accessibility, then Hearing Devices. Leave that screen open. Next, put the hearing aids into pairing mode. For battery-door models, open and close the battery doors. For rechargeable models, place them in the charger for a few seconds and remove them. Most hearing aids remain discoverable for about three minutes after power cycling. The iPhone should detect the aids and display their name. Tap the name when it appears.
For binaural hearing aids, the iPhone often shows one pairing request followed by a second prompt for the opposite side. Accept both prompts. Users sometimes tap only the first dialog and assume the process is complete, which leaves one aid connected and the other unavailable for streaming. Once paired, the Hearing Devices screen will show battery status, connection state, and accessibility shortcuts. You can test the link by playing audio from Apple Music, YouTube, or the Phone app. If audio only streams to one side, power cycle both aids again and reopen the Hearing Devices menu before deleting the pairing. A partial connection is often recoverable without starting over.
After initial pairing, triple-clicking the side button or home button, depending on the iPhone model, can open quick controls for hearing devices. From there, users can adjust volume, choose audio presets, and activate Live Listen if supported. In real use, this is one of the most valuable features because it lets the iPhone act like a remote microphone. Place the phone near the person speaking, and their voice is transmitted to the hearing aids. In restaurants, classrooms, and cars, that can noticeably improve speech pickup compared with relying only on the hearing aid microphones several feet away.
How to pair Bluetooth hearing aids that use a companion app
Not all hearing aids pair through the Accessibility menu. Some modern devices connect through standard Bluetooth procedures and then rely on a manufacturer app for control and audio management. The exact sequence varies by brand, but the usual process is to install the app, create or sign in to an account if required, enable Bluetooth permissions, and follow the in-app pairing wizard. Brands commonly guide users to power cycle the hearing aids, hold them near the iPhone, and wait while the app identifies left and right devices separately. The app may then request permissions for notifications, microphone use, and background app refresh.
This route is common because companion apps do more than pair the devices. They can store fitting programs from the audiologist, geotag listening environments, support remote fine-tuning sessions, check firmware versions, connect to accessories such as TV streamers, and surface battery health data. I strongly recommend completing any firmware update before judging connection stability. Wireless reliability often improves after updates that refine Bluetooth handshakes, microphone routing, and streaming behavior on newer versions of iOS. During the update, keep the phone close, disable Low Power Mode, and avoid locking the screen if the brand specifically instructs you to keep the app active.
One distinction users should understand is that successful app control does not always mean direct hands-free calling is enabled. Some hearing aids support media streaming but use the iPhone’s built-in microphone for outgoing calls, while others support true hands-free operation where the hearing aid microphones carry your voice. This depends on the model, firmware, iPhone version, and wireless standard in use. If call audio sounds good but the other person cannot hear you clearly, check the app’s calling settings and the brand’s support page to confirm whether your devices support full bidirectional streaming on your specific iPhone.
Settings that improve streaming, calls, and daily use
Once paired, spend a few minutes optimizing settings. Open Settings, Accessibility, Hearing Devices for MFi products, or the brand app for other models. Turn on hearing aid compatibility if the manufacturer recommends it, but do not assume it is always needed; on some setups it changes radio behavior in ways that are only useful for older accessories. Check Audio Routing under Accessibility and confirm whether calls, media, and ringtones should go automatically to the hearing aids or stay on the iPhone speaker until selected. Users who wear hearing aids all day usually benefit from automatic routing for calls and media, while occasional users may prefer manual selection to preserve battery life.
Microphone behavior also deserves attention. On some hearing aid systems, streaming media reduces environmental microphone input so music sounds cleaner. On others, mixing remains active so you can still hear surroundings, which is useful for safety but can make podcasts harder to follow in noisy places. Your audiologist can often tune these ratios in the fitting software. If you regularly use FaceTime, Zoom, or Teams, test each app individually. Some conferencing apps override system defaults, and I have seen cases where a hearing aid pair works perfectly in Phone and FaceTime but needs a separate audio output selection in Teams.
| Task | Best iPhone Path | What to Check |
|---|---|---|
| Initial pairing for MFi aids | Settings > Accessibility > Hearing Devices | Both sides appear, both prompts accepted, battery above 50% |
| Initial pairing for app-based aids | Manufacturer app wizard | Bluetooth permission, firmware version, account sign-in |
| Call audio issue | Accessibility or app call settings | Whether device supports hands-free microphones |
| One aid not connecting | Power cycle aids and reopen pairing screen | Old device connections, low battery, incomplete second prompt |
| Poor streaming stability | Keep phone on same side or front pocket | Body blocking signal, outdated iOS, crowded RF environment |
Troubleshooting common pairing problems
If hearing aids will not pair to iPhone, start with the basics in the correct order. Confirm Bluetooth is on. Restart the iPhone. Power cycle the hearing aids. If they are MFi devices, return to Accessibility, Hearing Devices instead of the standard Bluetooth list. If they are app-based devices, remove any stale pairing records in the app and in Bluetooth settings, then begin again from the manufacturer’s wizard. Keep the phone within a few inches of the hearing aids during discovery. Human bodies absorb Bluetooth signals, and pairing can fail if the phone is in a back pocket while you are trying to connect devices behind the ears.
If only one hearing aid connects, the issue is usually either low battery in one side, a missed second pairing prompt, or an ear-to-ear link problem between the aids themselves. Recharge both sides, turn them off and back on together, and retry. If streaming drops when the phone is on the opposite side of your body, that points to signal attenuation rather than a defective hearing aid. Carry the iPhone in a shirt pocket, jacket pocket, or on the same side as the stronger receiver. In gyms, airports, and conference venues with heavy wireless traffic, occasional dropouts are normal even on healthy systems.
Persistent failures justify deeper checks. Update iOS. Update the hearing aid firmware in the brand app or with your audiologist. Reset network settings only if simpler steps fail, because that also removes saved Wi-Fi networks and other Bluetooth accessories. If the hearing aids connect to the app but not for streaming, verify that the exact model supports iPhone audio streaming. Some entry-level products offer remote control without direct audio streaming. If call quality remains poor, ask your audiologist whether the fitting profile can be adjusted for streaming comfort, microphone mixing, feedback management, and telecoil or environmental noise settings. Hardware pairing is only one part of a usable setup.
When to involve your audiologist or Apple Support
Some problems are not user error and should be escalated quickly. If the hearing aids disappear from the pairing screen repeatedly, one side never powers into discoverable mode, battery reporting is erratic, or firmware updates stall every time, your audiologist should inspect the devices. They can check receiver condition, charger contact reliability, firmware compatibility, and fitting software logs that consumers cannot access. Apple Support becomes relevant when the iPhone itself shows broader Bluetooth instability, such as repeated failures with AirPods, car audio, and wearables in addition to the hearing aids. In that case, the phone may need software repair, settings review, or hardware evaluation.
Audiologists also help with issues that users often mistake for pairing failures. For example, a patient may say the hearing aids are connected but “sound wrong” on calls. Often the connection is fine; the real issue is that the streaming program has too much environmental microphone input, too little low-frequency gain for voices, or aggressive noise reduction that clips speech cues. These are fitting adjustments, not Bluetooth faults. In my experience, the best outcomes happen when pairing and acoustic tuning are treated as one workflow rather than separate problems. A technically successful connection only matters if speech is clear, comfortable, and consistent in daily life.
Pairing hearing aids to iPhone becomes simple once you identify the correct connection method, prepare both devices, and understand where Apple’s accessibility tools end and the manufacturer app takes over. Start by confirming compatibility, charging the hearing aids, updating iOS, and checking whether your model uses the Hearing Devices menu or a brand-specific wizard. Accept both pairing prompts for two hearing aids, then test calls, media, and microphone behavior in the apps you actually use. If something fails, work through the basics first: restart, power cycle, forget stale pairings, and retry with the phone nearby.
The main benefit of a proper setup is not just wireless convenience. It is better communication: clearer phone calls, easier media listening, quicker control over volume and programs, and practical tools such as Live Listen and remote adjustments. That makes the iPhone a useful extension of the hearing aid system rather than just another gadget. If you are building out a full understanding of Hearing Aids, use this page as your starting point, then move to detailed guides on compatibility lists, app-specific setup, streaming troubleshooting, and audiologist fitting options. Begin with your exact hearing aid model and iPhone version, and you will solve most pairing issues much faster.
Frequently Asked Questions
How do I pair hearing aids to an iPhone the right way?
Start by confirming that your hearing aids are compatible with iPhone. Many modern models support Apple’s Made for iPhone hearing aid system, while others use standard Bluetooth or require a manufacturer app for setup. On your iPhone, go to Settings > Accessibility > Hearing Devices rather than the regular Bluetooth menu if you are pairing Made for iPhone hearing aids. This is one of the most common points of confusion, because users often open Settings > Bluetooth first and assume the devices are not discoverable when they do not appear there.
Next, make sure the hearing aids are actually in pairing mode. In most cases, this means turning them off and back on, opening and closing the battery doors if they use disposable batteries, or placing them briefly in their charger and removing them if they are rechargeable. Keep the hearing aids close to the iPhone during this process. Once the iPhone detects them, their name should appear under Hearing Devices. Tap the name, review any prompts, and accept the pairing request. If you have two hearing aids, you may be asked to confirm pairing more than once, which is normal.
After pairing, test audio and accessibility controls. You should be able to stream calls, adjust hearing aid settings, and access quick controls from the iPhone. Some users also benefit from enabling features like Live Listen or adjusting audio routing preferences. If the devices do not connect immediately, restart the hearing aids and the iPhone, then try again from the same Accessibility menu. Following the proper menu path and pairing sequence usually resolves the issue quickly.
Why won’t my hearing aids show up on my iPhone when I try to connect them?
If your hearing aids are not appearing, the first thing to check is whether you are using the correct connection method. Made for iPhone hearing aids usually appear in Settings > Accessibility > Hearing Devices, not in the normal Bluetooth device list. If your hearing aids are an older Bluetooth accessory or a model designed to work through a specific brand app, they may instead need to be paired through the manufacturer’s setup instructions. This distinction matters, because not every hearing device uses Apple’s native hearing aid pairing system.
The second likely cause is that the hearing aids are not in pairing mode. Hearing aids often stay discoverable only for a short time after powering on. If the iPhone does not find them right away, turn the hearing aids off and on again, then reopen the Hearing Devices screen. Make sure Bluetooth is enabled on the iPhone, and keep the phone within a few feet of the hearing aids. If the hearing aids were previously connected to another phone or tablet, they may also need to be disconnected or reset before they can be discovered by the iPhone.
Another common issue is software or device compatibility. An older iPhone version, outdated hearing aid firmware, or incomplete setup in the hearing aid app can all interfere with detection. Updating iOS, installing the manufacturer’s app if recommended, and checking the hearing aid model’s compatibility list can save a lot of time. If the devices still do not appear, unpair any previous hearing aid entries from the iPhone, restart both devices, and repeat the process. In many real-world cases, the problem is not that the hearing aids are broken, but simply that the iPhone is searching in the wrong place or the hearing aids were not ready to pair.
Do I pair hearing aids through Bluetooth settings or through Accessibility on iPhone?
That depends on the type of hearing aids you have. If your hearing aids are Made for iPhone, you typically pair them through Settings > Accessibility > Hearing Devices. Apple created this path specifically for supported hearing aids because it allows deeper integration with accessibility features, call handling, audio routing, and system-level controls. These devices may not appear in the standard Bluetooth list at all, which often leads people to think the pairing process is failing when it is actually working as designed.
If your hearing aids use standard Bluetooth audio or are an older accessory, they may be paired through the regular Settings > Bluetooth menu, or through a manufacturer-provided app. Some hearing aid brands rely on their own app to complete setup, manage streaming preferences, update firmware, or activate remote microphone functions. In those situations, the app may be an essential part of the process rather than an optional extra. That is why it is important to check the hearing aid brand’s instructions instead of assuming every model follows the same iPhone pairing steps.
As a practical rule, if the device is marketed as compatible with Apple hearing aid controls, start in Accessibility. If it behaves more like a generic Bluetooth accessory, use the Bluetooth menu or the brand app. Choosing the right menu from the beginning prevents wasted time and reduces failed pairing attempts. It also ensures that features like direct call streaming, media playback, and microphone options work the way the manufacturer intended.
How do I control calls, media, and microphone routing after pairing my hearing aids to iPhone?
Once your hearing aids are connected, the iPhone can often route phone calls, certain media audio, and accessibility features directly to them. For Made for iPhone hearing aids, many controls become available in Settings > Accessibility > Hearing Devices. From there, you may be able to adjust streaming behavior, enable compatibility features, and control how audio is delivered to the left and right hearing aids. Some settings are also accessible through the iPhone’s Accessibility Shortcut or Control Center, depending on your device and iOS version.
Call routing is usually automatic once pairing is complete, but media routing can vary by hearing aid model. Some devices support phone calls and system sounds very well, while others handle music, videos, and app audio differently. If you notice that phone calls work but music does not, that may be normal for your specific hearing aid type rather than a sign of a malfunction. Manufacturer apps sometimes provide additional control over microphone balance, environmental programs, sound presets, and how external audio is mixed with the microphones on the hearing aids.
Microphone routing can also depend on whether you are using the hearing aids alone or alongside another accessory such as a remote microphone. In everyday use, it helps to test three things after pairing: make a phone call, play media, and check whether the hearing aids are using their microphones naturally in your current environment. If something seems off, review the hearing aid settings in Accessibility, check the brand app, and make sure the iPhone is updated. Properly configured routing can significantly improve clarity, convenience, and overall hearing aid performance with an iPhone.
What should I do if my hearing aids disconnect from my iPhone or keep failing to reconnect?
Intermittent disconnections are usually caused by one of a few predictable issues: low battery in the hearing aids, temporary Bluetooth instability, outdated software, or incomplete pairing from an earlier setup attempt. Begin with the simplest checks. Confirm that both hearing aids are charged or have fresh batteries, and make sure Bluetooth is turned on for the iPhone. Then place the hearing aids close to the phone and restart both devices. For rechargeable hearing aids, placing them in the charger briefly and removing them can help trigger a fresh connection attempt.
If the problem continues, go back to Settings > Accessibility > Hearing Devices and see whether the iPhone still recognizes them. If they appear but are not actively connected, try reconnecting from there. If they do not appear correctly, remove or forget the existing connection if possible, then repeat the pairing process from the beginning. Users often spend time troubleshooting Bluetooth in general when the real problem is that the original hearing aid pairing did not complete properly or one side of the pair did not sync as expected.
It is also wise to check for iOS updates and any hearing aid firmware updates available through the manufacturer app. Older firmware can create reconnection delays, unstable streaming, or one-sided audio dropouts. If you regularly move between multiple Apple devices, such as an iPhone and iPad, make sure the hearing aids are not trying to connect somewhere else unexpectedly. In persistent cases, a hearing care professional or the hearing aid manufacturer can verify whether the device needs a reset, firmware service, or a different setup method. Most reconnection issues are fixable, and the solution is often much simpler than it first appears.