Hearing aid filters are small components that protect the delicate acoustic system inside a hearing aid, shape sound delivery, and reduce the damage caused by earwax, moisture, and debris. For many wearers, filters are easy to overlook because they are tiny, inexpensive, and often hidden near the receiver or microphone opening. Yet in daily practice, I have seen more sudden “device failures” caused by blocked or worn filters than by major electronic defects. Understanding what hearing aid filters do, when to replace them, and how they fit into broader hearing aid maintenance can extend device life, improve clarity, and prevent unnecessary repair visits.
In simple terms, a hearing aid filter is a barrier or screening element placed in a specific part of the device to protect sound pathways. The most familiar type is the wax guard, which sits at the end of the receiver or sound outlet and stops cerumen from entering the speaker area. Other filters may protect microphone ports from dust and wind-borne particles, or help control moisture in devices used in humid environments. Depending on the design, a filter may be a disposable disk, mesh, membrane, or molded insert. Different brands use proprietary systems, so the right replacement part matters.
Why does this topic matter? Because hearing aids operate in one of the harshest environments for consumer electronics: the ear canal. Earwax is acidic, sticky, and highly variable from person to person. Sweat introduces salt and moisture. Skin cells and cosmetic residue can collect around openings. If these contaminants move into the receiver, they can muffle high frequencies, create intermittent output, or stop sound completely. A blocked filter can mimic battery failure, software problems, or receiver damage. For users, that means frustration and lost hearing access. For clinicians, it means a basic maintenance issue can delay proper communication if it is not identified quickly.
This article serves as a general hub for hearing aid filters within the broader hearing aids category. It explains the main filter types, how they work, how to recognize problems, replacement schedules, compatibility issues, and the limits of home maintenance. It also points naturally toward related topics such as hearing aid cleaning, receiver maintenance, earmold care, moisture management, and professional servicing. If you want a practical understanding of hearing aid filters without jargon or guesswork, this guide covers the essentials clearly and completely.
What hearing aid filters do and where they are located
The primary job of a hearing aid filter is protection. In receiver-in-canal, mini behind-the-ear, and many custom in-the-ear devices, the wax guard protects the receiver opening, which is the final point where amplified sound exits the aid and enters the ear. Because this opening faces the ear canal directly, it is the first place wax accumulates. A wax guard acts like a sacrificial shield: it blocks contaminants before they can enter the receiver. Once clogged, it is replaced rather than cleaned indefinitely.
Microphone filters serve a related but different role. They sit over microphone ports and reduce intrusion from dust, skin oil, lint, and, in some designs, gust noise. These filters must remain acoustically transparent enough to preserve speech cues, especially in the 2 kHz to 6 kHz range where consonant clarity lives. Manufacturers balance protection with acoustic performance, which is why generic substitutes are rarely a good idea. A material that is too dense can alter frequency response and directional microphone behavior.
Some devices also rely on moisture barriers or hydrophobic membranes. These are especially common in modern aids marketed with ingress protection features, such as IP68-rated designs that resist dust and water exposure under defined laboratory conditions. It is important to understand that water resistance does not make a hearing aid waterproof in real life. Filters still need maintenance because repeated sweat exposure, temperature swings, and skin oils gradually reduce their effectiveness.
Location varies by style. In a receiver-in-canal aid, the wax guard is usually visible at the dome or custom tip end after the eartip is removed. In custom in-the-ear models, it may sit flush with the sound bore. Microphone filters are often on the faceplate or case shell and may look like tiny slots or pinholes. Knowing which opening does what matters, because inserting a tool into the wrong port can damage a microphone diaphragm or push debris deeper into the device.
Common types of hearing aid filters and how they differ
Not all hearing aid filters are interchangeable. The broad categories include wax guards, microphone covers, and protective membranes, but within those groups there are brand-specific systems. Widex, Phonak, Oticon, Signia, ReSound, Starkey, and Unitron all use replacement parts designed around their own receivers, housings, and acoustic targets. A wax guard that physically fits may still perform poorly if its mesh density or insertion depth is wrong. In clinic, I have seen mismatched guards cause reduced output and patient complaints that disappeared once the correct part was installed.
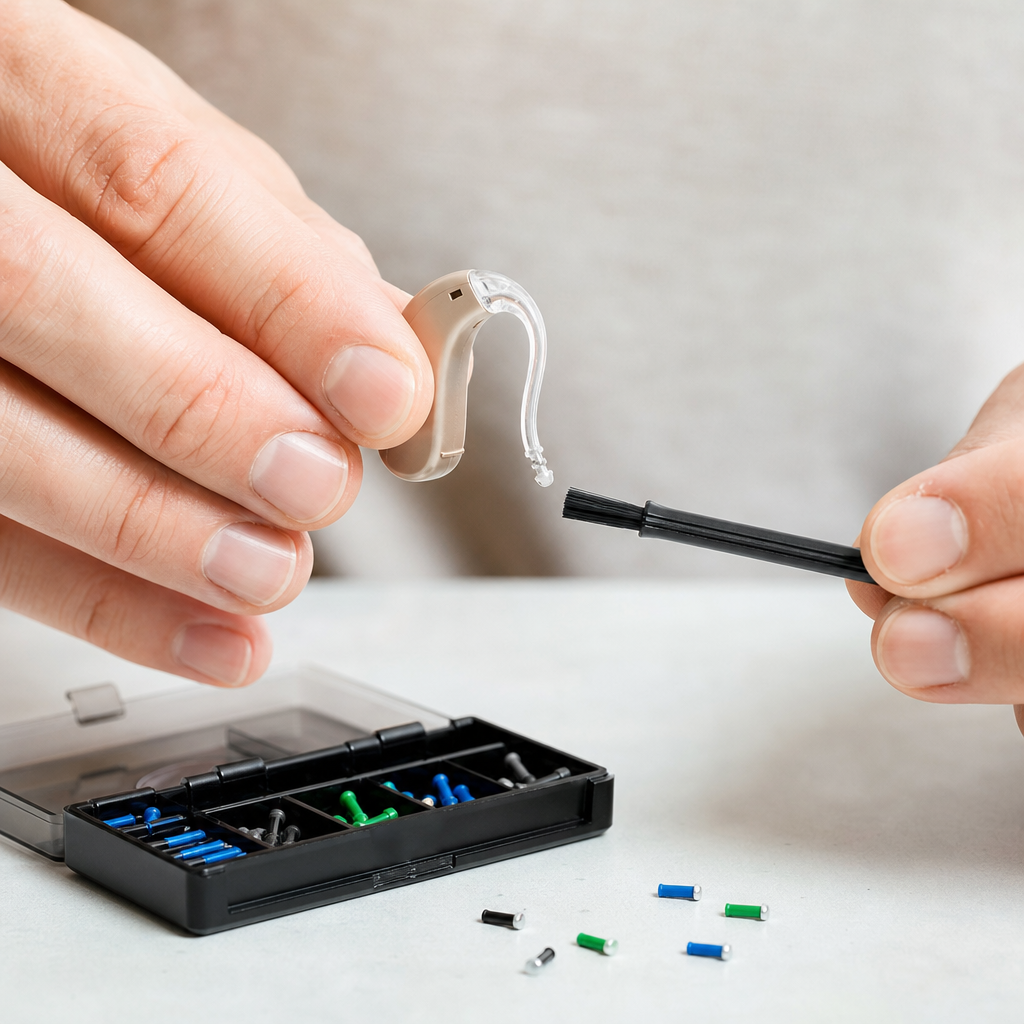
Wax guard systems are usually either stick-mounted disposables or snap-in modules. Stick-mounted designs often place a fresh guard on one end of a tool and the removal pin on the other. The old filter is extracted, the new one is pressed into place, and the tool is discarded after use. This system is convenient and hygienic. Snap-in or cartridge-style systems may be easier for users with dexterity challenges, though availability depends on model compatibility.
Microphone filters are less often user-replaceable. Some are integrated into service parts and changed only during professional maintenance. Others can be brushed clean externally but not removed. This distinction matters because users sometimes assume every visible screen is a wax guard. It is not. If a clinician or manufacturer guide does not identify a microphone cover as user-serviceable, do not pry it out. Replacement may require adhesives, shell alignment, or electroacoustic verification after installation.
| Filter type | Main purpose | Typical location | User replaceable | Common issue when blocked |
|---|---|---|---|---|
| Wax guard | Stops cerumen entering receiver | Sound outlet or receiver tip | Usually yes | Weak or no sound |
| Microphone cover | Protects microphone from dust and oil | Faceplate or case port | Sometimes | Muffled speech pickup |
| Moisture membrane | Limits liquid and humidity intrusion | Port openings or shell vents | Rarely | Intermittent performance |
| Vent screen | Reduces debris in vent path | Earmold or shell vent | Varies | Feedback or occlusion changes |
The practical takeaway is straightforward: use the exact filter system specified for your hearing aid model. If you are unsure, check the device manual, ask your audiologist, or match the replacement using the manufacturer’s part number rather than appearance alone.
Signs a hearing aid filter needs attention
The most common sign of a blocked hearing aid filter is reduced volume despite a charged battery or fully powered rechargeable device. Users often describe the sound as faint, dull, or “like listening through cotton.” High-frequency sounds usually disappear first because fine mesh blockage attenuates treble more readily than low-frequency energy. Speech may still be audible, but consonants such as /s/, /f/, and /th/ become less distinct, making conversations harder to follow even when loudness seems acceptable.
Another clue is intermittent output. A partially blocked wax guard can pass sound unevenly, especially if wax softens with body heat and shifts position. Users may notice that tapping the aid, removing and reinserting it, or changing listening programs seems to fix the problem temporarily. In reality, those actions often just move the obstruction. If the issue returns quickly, inspect the filter before assuming a software or Bluetooth problem.
Feedback can also point to filter-related issues, though indirectly. If blockage alters the expected acoustic path, the fitting may behave differently than the programmed target. In custom devices, debris in the sound bore or vent can change venting and output enough to increase whistling. Likewise, a clogged microphone cover can reduce environmental pickup and make the aid sound unbalanced compared with the other ear. Uneven hearing between left and right devices is a common reason to compare filters first.
Visible wax, discoloration, or moisture droplets are obvious red flags. However, not every failed filter looks dirty. Fine skin oil residue can create an almost invisible film. That is why routine replacement matters even when the guard appears clean. If changing the wax guard does not restore sound, the next steps usually include trying a listening check, changing the dome, inspecting the receiver, and scheduling professional service if performance remains poor.
How often hearing aid filters should be replaced
There is no universal replacement schedule because earwax production, climate, device style, and wearing time vary widely. A person with dry, flaky cerumen may go several months between wax guard changes. Someone with soft, abundant wax who wears receiver-in-canal aids all day may need a new guard every two to four weeks. In humid conditions, sweat and moisture can shorten filter life even when wax is minimal. The best rule is to replace filters whenever sound quality drops and to establish a preventive schedule based on your own pattern.
Most manufacturers and clinics recommend checking wax guards at least weekly and replacing them proactively every month or two for many users. That advice is conservative and practical. It reduces surprise failures and keeps the receiver protected. For new wearers, I usually suggest tracking each replacement date for the first three months. A simple note in a phone app quickly reveals whether your devices tend to clog every three weeks, six weeks, or only after exercise-heavy periods.
Seasonal factors matter. In summer, perspiration can combine with sunscreen, hair products, and skin oil to contaminate filters faster. In winter, hats and dry indoor air may increase lint and flaky debris around microphone ports. People with narrow ear canals, chronic otitis externa, or heavy cerumen production may need more frequent checks and occasional medical wax management. If wax accumulates excessively, replacing filters alone will not solve the root problem.
Children, older adults with dexterity limitations, and anyone dependent on hearing aids for work should keep spare filters on hand. A blocked filter is minor only if replacement materials are available immediately. For many people, the difference between replacing a wax guard at home and waiting three days for an appointment is the difference between full communication and significant isolation.
How to replace hearing aid filters safely
Safe replacement starts with identifying the correct part and following the device-specific instructions. Wash and dry your hands, work under bright light, and place a soft towel on the table so tiny parts do not bounce away. For receiver-in-canal models, remove the dome or eartip if required, inspect the sound outlet, and use the manufacturer’s tool exactly as directed. The removal tip extracts the old guard; the insertion tip seats the new one. Push gently and evenly. If resistance feels unusual, stop and verify alignment rather than forcing the part.
Do not reuse old guards or attempt to wash disposable filters. Once the mesh has trapped wax or oil, cleaning rarely restores its original acoustic transparency. Reuse also risks introducing debris into the receiver opening. If wax sits around the outlet, wipe the surrounding area with a dry cloth before placing the new guard. Avoid alcohol unless the manufacturer explicitly approves it, because some plastics, adhesives, and coatings degrade with repeated solvent exposure.
Microphone areas require extra caution. Brushing the exterior with a hearing aid cleaning brush is usually safe, but inserting picks or loops into microphone ports is not. Those components are more fragile than wax guards and may require professional replacement if damaged. Rechargeable hearing aids also need attention at charging contacts and seams, but cleaning those areas is separate from filter replacement and should follow the maker’s care guide.
After installing a new filter, perform a quick listening check. Confirm that startup tones, environmental sounds, and speech are clear. Compare left and right aids for balance. If sound remains weak, the problem may be a damaged receiver, blocked vent, torn dome, low battery performance, or internal moisture. Filter replacement is a first-line maintenance step, not a cure for every hearing aid problem.
Choosing replacement filters, supplies, and professional help
The best replacement filters are the ones specified by the hearing aid manufacturer or dispensed by your audiologist or hearing instrument specialist. While third-party accessories can be tempting, quality control varies. An incorrect mesh, poorly molded housing, or loose fit can affect output or fall into the ear canal. Use the model name, serial-linked records from your clinic, or the exact part number from the packaging when reordering. Many clinics bundle wax guards into follow-up care, and manufacturer online stores often list compatibility by device family.
It also helps to build a small maintenance kit. A practical kit includes wax guards, domes or earmold cleaning tools, a dry microfiber cloth, a brush, a wax loop if approved for your style, and a dehumidifying case or electronic drying box. Drying systems are especially useful for active users and people in humid climates. They do not replace filters, but they reduce moisture stress that can compound blockage and corrosion.
Professional help is the right choice when repeated filter changes do not restore performance, when a filter is stuck, when there is visible corrosion, or when earwax production is unusually heavy. Clinics can run electroacoustic checks, replace receivers, clean microphone ports safely, and verify output against programmed targets. If your ears feel blocked, painful, or suddenly different, seek medical evaluation as well. Sometimes the hearing aid is functioning normally and the real issue is impacted cerumen or ear disease.
Hearing aid filters may be tiny, but they are central to reliable sound, device longevity, and day-to-day communication. Learn which filters your devices use, check them routinely, replace them on schedule, and do not guess when compatibility is unclear. Good filter care prevents avoidable problems and keeps your hearing aids performing as they were fitted to perform. If you have not reviewed your current maintenance routine recently, start today by identifying your filter type and ordering the correct spares.
Frequently Asked Questions
What is a hearing aid filter, and why is it so important?
A hearing aid filter is a very small but highly important component designed to protect the internal acoustic system of a hearing aid. Depending on the style of device, the filter may sit near the receiver, wax guard opening, or microphone port. Its main job is to act as a barrier against earwax, skin oils, dust, and moisture before those contaminants can travel deeper into the device and interfere with sound transmission or damage delicate parts.
Although filters are easy to overlook, they play a major role in day-to-day hearing aid performance. In many cases, what seems like a sudden device malfunction is actually a blocked or worn filter. When a filter becomes clogged, sound may become weak, distorted, intermittent, or disappear entirely. This can make users think the battery, speaker, or electronics have failed when the issue is often much simpler. Filters also help maintain consistent sound quality by supporting proper acoustic flow, which means they contribute not only to protection but also to how clearly and naturally the hearing aid delivers sound.
Because hearing aids sit in a challenging environment with constant exposure to heat, humidity, earwax, and movement, filters are one of the frontline defenses that keep the device functioning reliably. Replacing them on schedule is one of the easiest and most cost-effective maintenance habits a hearing aid wearer can adopt.
How can I tell if my hearing aid filter needs to be changed?
There are several common signs that suggest a hearing aid filter may need replacement. The most noticeable is reduced volume. If your hearing aid suddenly sounds quieter than usual, even after adjusting the volume or changing the battery, a clogged filter is often the first thing to check. You may also notice muffled sound, crackling, distortion, or intermittent performance where the hearing aid seems to cut in and out. In some cases, one hearing aid may sound weaker than the other even though both devices are set the same way.
A visual inspection can also help. If the filter looks discolored, blocked, or coated with wax or debris, it is probably due for replacement. Some filters become visibly dark or opaque when clogged. Others may not look completely blocked but can still restrict sound enough to affect performance. If you wear your hearing aids for many hours each day, produce a lot of earwax, or live in a humid climate, your filters may require more frequent checks.
It is also wise to think about timing rather than waiting for obvious problems. Many hearing care professionals recommend checking filters regularly as part of a weekly cleaning routine and replacing them according to the device manufacturer’s guidance. If you are unsure whether the filter is the problem, replacing it is usually a quick and low-risk troubleshooting step. If performance does not improve after changing the filter, then a deeper cleaning or professional inspection may be needed.
How often should hearing aid filters be replaced?
There is no single replacement schedule that fits every hearing aid user because filter life depends on several factors, including earwax production, humidity exposure, skin oils, device style, and how many hours per day the hearing aids are worn. For some people, filters may last a month or longer. For others, especially those who produce more wax or wear receiver-in-canal devices, replacement may be needed every couple of weeks or even more often.
As a general rule, filters should be checked regularly and replaced whenever they show visible buildup or when sound quality begins to decline. People who rely on their hearing aids every day often benefit from making filter checks part of a consistent maintenance schedule. This proactive approach helps prevent frustrating situations where a device seems to fail unexpectedly during an important conversation, phone call, or appointment.
Manufacturer instructions are the best starting point because filter types vary from brand to brand. Some hearing aids use wax guards designed for frequent replacement, while others have microphone filters that may require professional servicing. If you are new to hearing aids, your audiologist or hearing care provider can help you establish a practical schedule based on your ears, your device type, and your lifestyle. In practice, replacing filters a little earlier is usually better than waiting too long, since the cost of a new filter is minor compared with the inconvenience and possible damage caused by letting debris build up inside the device.
Can I replace a hearing aid filter myself, or should I have a professional do it?
In many cases, yes, you can replace a hearing aid filter yourself. Most modern hearing aids that use wax guards or receiver filters are designed with user-friendly replacement systems. These often come with small disposable tools that allow you to remove the old filter and insert a new one in just a few steps. Once you have been shown how to do it correctly, the process is usually simple, quick, and safe for routine maintenance at home.
That said, it is important to use the correct filter type for your specific hearing aid model. Filters are not universal, and using the wrong size or design can affect sound performance or fail to protect the device properly. You should also handle the hearing aid gently during replacement, since the receiver area and microphone openings are delicate. If you have limited dexterity, reduced vision, or difficulty managing very small parts, replacing filters can be frustrating, and professional help may be the better option.
There are also situations where a professional visit is the right choice. If changing the filter does not restore sound, if the hearing aid still seems weak or dead, or if you suspect moisture or debris has moved deeper inside the device, a hearing care professional should inspect it. Professional cleaning can address problems that filter replacement alone cannot fix. In short, most users can and should learn basic filter replacement, but they should also know when to stop troubleshooting and seek expert support.
What is the best way to care for hearing aid filters and extend the life of my hearing aids?
The best way to protect hearing aid filters and extend device life is to combine regular cleaning, good storage habits, and timely filter replacement. Start by wiping your hearing aids daily with a soft, dry cloth to remove surface oils and moisture. Before inserting the devices, make sure your ears are reasonably clean and dry, since excess wax and moisture place more stress on the filter system. At the same time, avoid inserting anything into the hearing aid openings, as this can push debris farther inside or damage the filter seat.
Proper storage matters as well. When you are not wearing your hearing aids, keep them in a clean, dry case or a hearing aid dehumidifier if recommended by your provider. Moisture is one of the most common threats to hearing aid performance, and filters can only do so much if the device is repeatedly exposed to sweat, steam, or damp environments. If you live in a humid area or are physically active, extra drying support can make a noticeable difference.
It is also important to treat filters as preventive maintenance rather than emergency repair. Keep spare filters on hand so you are not left without a working device when one becomes blocked. Follow the manufacturer’s instructions, and attend routine hearing aid checkups so your provider can inspect the receiver, microphones, earmolds, and other parts that work alongside the filter. When these simple habits are followed consistently, filters do more than stop wax and debris; they help preserve sound quality, reduce avoidable repairs, and keep hearing aids performing dependably for longer.